

What is GSTR 1 and who shall file it?
GSTR 1 is a monthly or quarterly return that summarizes the details of outward supplies or sales of a registered person.
Every registered person under GST shall file GSTR-1 irrespective whether or not there are any outward supplies or sales during that particular period.
However, there are a certain exempted person under GST who are not required GSTR 1 filing software and the person includes
• Composition Scheme Holder
• E-Com Operators Collecting TCS
• TDS Deductors
• NRTP
• ISD (Input Service Distributor)
What is the due date for filing GSTR 1?
The due date of filing GSTR 1 completely rely on the turnover of a registered person.
Any person whose outward supplies is less than 1.5 crore INR has to file GSTR 1 quarterly.
Whereas, any registered person whose outward supplies or sales exceeds the 1.5 crore INR mark has to file GSTR 1 monthly.
What are the consequences for not filing GSTR 1?
Late filing of GSTR 1 attracts a late fee of Rs. 25 SGST/UTGST and Rs. 25 CGST ( total 50 INR per day) calculated from the due date.
However, as per the latest update, the penalty of NIL returns has been reduced to Rs 20 per day respectively from the due date.
In addition to this no late fee is applicable till 31st March 2019.
Guide to file GSTR 1 using autoTax
1. Log in to autoTax GST Software using valid credentials and captcha image. See GSTR 1 login:

2. Import sales data by clicking GST Sales Data

3. Select View from the drop-down menu

4. Click Import Invoices

5. Download the Invoice format using Download Invoice Format option.

6. After clicking on Download Invoice Format a pop up window will appear showing the format

7. Choose the invoice file from the system and click on Import Invoices

8. Then it will show the job process sheet which shall be refreshed thereafter .

9. Afterwards, go to GST Returns option on autoTax

10. Select View Returns from the drop down bar

11. Select Prepare from the GSTR 1 option present in the Returns File Dashboard

12. Click Upload button

13. Select the year and month present on the top to see the uploaded invoices

14. Choose the invoices you want to upload by clicking the checkbox present and select upload

15. Click on the GST Return and then choose View Return option. Then choose Finalize option present under GSTR.

16. After that a summarized table will appear then click Upload button

17. Click on the E-Sign button to proceed with the GSTR filing. Before proceeding to the filing, verify your summary by clicking on View Summary and make sure that the auto tax Summary and GST Summary is reconciled

18. Click on Submit Button before submitting a pop-up will come on the screen asking for the invoice(s) stating “Are you sure you want to upload all your invoices”, Click OK

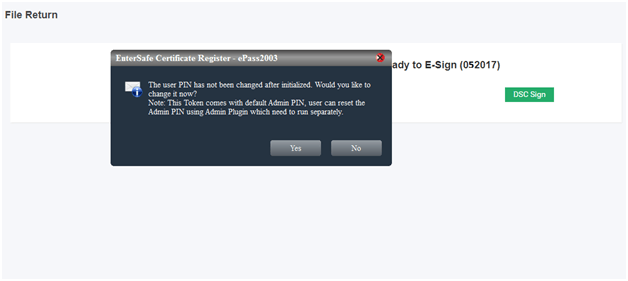
19. Now invoices have been submitted successfully on GST Portal, Click on DSC to file your return

20. Make sure DSC Dongle is inserted in your system properly. After inserting your dongle, it will ask whether to change the password or not, click accordingly and proceed
21. After clicking on DSC sign, various steps will come on the screen, follow all the steps and download DSCUPDATER

22. After installing the software, click on the icon and login pop-up will appear on the screen. Fill the login details given on the screen.

23. Accept the pending request by clicking on YES

24. Enter the PIN of DSC Dongle and click on log in

25. After login in, your signing option will be completed

26. GSTR 1 will get filed successfully

About the Author

- ★★
- ★★
- ★★
- ★★
- ★★

Check out other Similar Posts

CFO Weekly Digest
A weekly newsletter delivering sharp insights, strategic analysis, and critical updates on business, finance, and compliance — designed exclusively for CFOs and Finance Leaders
Masters India is a GST Suvidha Provider (GSP) appointed by Goods and Services Tax Network (GSTN), a Government of India enterprise.
 Procapitus Business Park, 4th Floor, D 247/4A, Sector 63 Rd, Noida, Uttar Pradesh 201301
 info@mastersindia.co


Certified